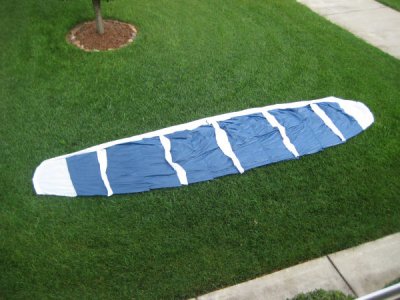
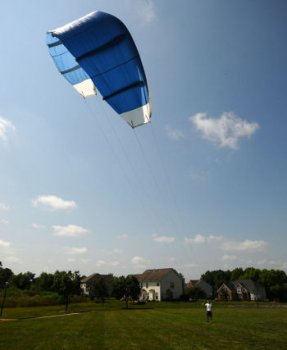
For those not familiar with kiteboarding I will give a brief explanation. A kiteboarder, as the name suggests, rides on some time of board (in my case it will be a board similar to a wakeboard in the ocean), using a large kite to harness the wind to pull themselves around wherever they like. The kiteboarder is harnessed to the kite and controls it via a special control bar. There are a few different types of kites that can be used, with inflatable kites being the most popular, and the kind that I show how to build in this article. Kiteboarding isn't limited to the water (which is why I use the more general term kiteboarding instead of kite-surfing), there is also kite-snowboarding, rollerblading, ice skating, kayaking, buggying, mountain boarding etc. This means that you don't have to live near the ocean to enjoy kiteboarding.
This article will focus on the construction of the kite its self. If you would like to see the construction of the control system, the harness or the board, I will have links here (and just about everywhere else) as soon as I have the articles written.
I didn't design this kite - I wanted to actually have it built before the end of summer, and to work after I spent so much time on it so that I wasn't wasting my money on fruitless designs. Though I am seriously considering designing my own now. I built a kite called "Ikaros Rev 2" by Stelios Alex, you can download plans, instructions and see some pictures of it here. It was a kite he designed that was almost made commercially. It was by far the best plans that I could find, and the included instructions helped a lot because I had never sewn anything before, let alone make a giant kite. The instructions included with the kite may be enough for some people, but I found myself scratching my head at some points so I am doing a detailed write up to help out anyone else who might be considering making a kite.
Why make your own kite?
Kiteboarding is expensive! Usually if I can build something I will make it instead of buying it, but I didn't have a choice with this project. Kites can easily cost more than a thousand dollars which I didn't have lying around. Besides that there is of course bragging rights and the satisfaction of a job well done (assuming you do it well, and finish it).
What you'll need and what it will cost.
I tried to keep this project as cheap as possible, and for the quality of kite that you will be making, its a steal. I wanted to keep the cost of the kite under $100, and discounting shipping, I did. Depending on what you order offline and where you live make sure you have an extra ~$30-40 for shipping. The prices you see below are the absolute cheapest for everything that I could find. In fact the ripstop nylon for $2.45 a yard is unbelievable. Most kite making sites charge $7 and up for it. The same goes for the Dacron fabric.
- 260' of 1/8 Polyester Cord - $18.20 Source
- Polyester Outdoor Thread - 2 mini kegs - $9.00 Info (Can be found at any fabric store)
- Dacron Fabric- 8 yards - $26.00 Source
- Ripstop Nylon- 11 yards, 1.1oz - $26.95 Source
- Nylon Webbing 1" wide, 8 feet -$0.25/ft - $2.00 Source
- PVC shower curtains 3x at $2.50/ea. $7.50. (I couldn't find them online, but they are sold at Target)
- 2 packs of kit tie inflatable armbands $2.00 dollar store. Info
I assume you have a sewing machine, a clothes iron, scissors, and optionally a soldering iron/wood burner (makes life/cutting fabric way easier, can be bought for about $6.00 and well worth it)
A few things I would like to point out
- Make sure you use the heaviest outdoor thread that you can find. The kite is put under extreme stresses when you are flying it and just regular Coats and Clark thread won't cut it.
- If you use a plastic other than PVC for the inflatable bladders then the kiddie armband valves will not work (they cannot be welded to other plastics) for more information read this
- Most of these things can be bought locally to save on shipping, the only things that I had to buy offline we're the fabrics because they we're still much cheaper even with shipping.
- 11 Yards of ripstop material doesn't seem like enough to build the kite considering that it is 10.6 square meters, but if you look closely the fabric is 67" wide by 1 yard so the surface area of one yard of fabric is more like 1.5 square meters. I actually bought about 1.3x the amount of material that I would need. This made cutting out the pieces less stressful because I wasn't too terrified about waste material between cut pieces making me run out of fabric.
Where to start
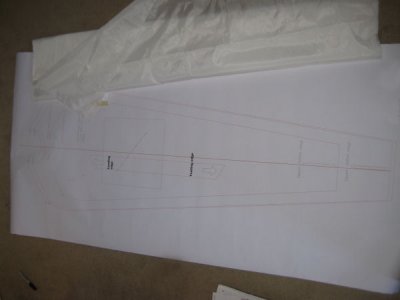
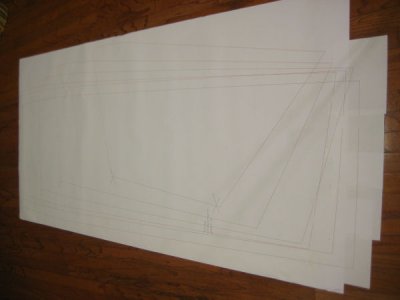
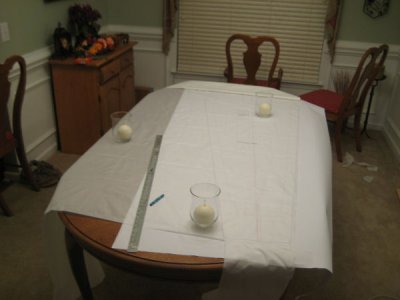
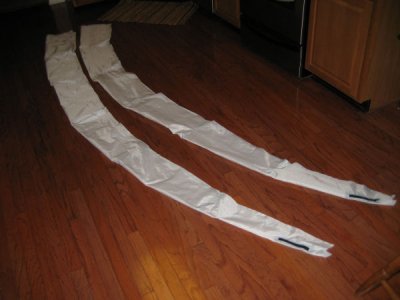
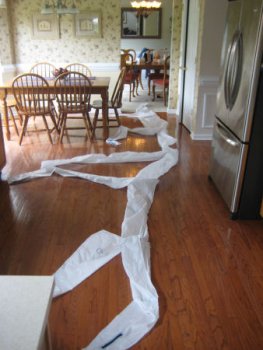
The first thing you will need to do is have your plans printed. I think doing this properly was the trickiest part of making the kite. The .DWG file has all of the parts printed out separately, you could print it this way, but it would take a 42 x 67" plot for each piece (which is about 20 plots). I took the plans into a .DWG editor and "layered" the parts onto each other (see image below) for each section (canopy, battens, wing tip batten) for a total of three plots. I didn't plot the inflatable battens plans as they are exactly the same as the fabric plan without the hole for the valve, zipper, or the semicircle cut out of the tip. I have access to a plotter so I didn't have to pay to have them printed, but you can have it printed at most any print shop I've heard. I'll host the tiled plots as soon as I get back up to school to get the files off my computer up there, in the image below you can see how i tiled the plot for the battens and the canopy drawings.
If you are having someone at a print shop print these for you, you probably won't have to worry about what I say next: if you are printing it yourself, depending on the plotter/.DWG editor you use it can be very tricky to get the plot to the correct scale (the drawing was made in millimeters so remember 25.4mm (or units) to an inch in order to get the correct scale if printing in inches) Just remember that print preview is your best friend and it is useful to print one of the 300mm squares in your first plot so you can measure it to make sure you're getting the correct scale.
Assuming you have all of the materials you will need now is the time to trace and cut out all of the pieces. From the instructions that come with the kite you will see that just about every part should be cut twice. I found that like the instructions said, drawing an arrow pointing toward the leading edge and toward the center of the kite along with a number to identify the particular panel to work perfectly, in fact if you don't you will have a very hard time differentiating between panels and whether they are right/left side etc. You will also want to mark on the battens and leading edge tube the arrows that mark the start and stop location for the joining stitches.
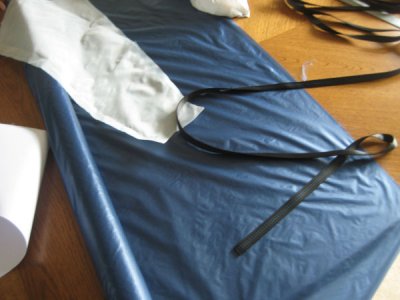
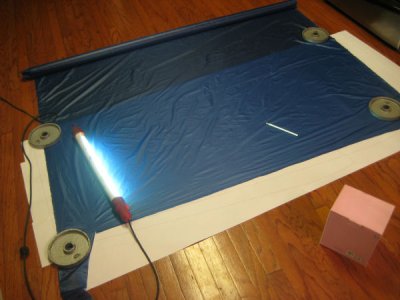
There are a lot of ways that could be used to get the patterns onto the fabric, I didn't want to destroy my plans so I chose to put the pattern under the fabric and trace the lines onto the fabric. I used a crayon to mark the pattern on the Dacron fabric, and a sharpie (comes in very handy later) for the ripstop nylon. I recommend using the sharpie for the Dacron as well. The Dacron was transparent enough to make tracing not a problem at all. The ripstop being dark blue was a bit more problematic. I ended up using fluorescent light (any light would to) to shine through the fabric so that I could see the lines on the pattern underneath. (see image below). After tracing the shape onto the fabric, I traced another line around the pattern 10mm away. This is the line I would cut, it is called leaving a seam allowance, and is leaves space to sew the joint while preserving your pattern.
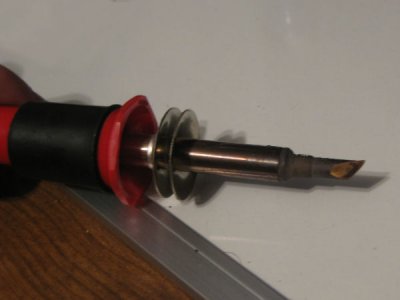
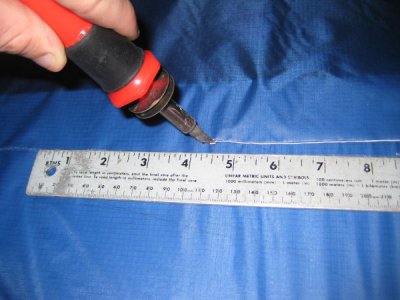
I would usually trace 1-2 pieces then cut them out. The best way to cut out the panels is with a sharp tipped soldering iron or wood burner. This makes cutting a breeze, in fact it was far far easier than using scissors, and it seals the end of the fabric so that the fabric doesn't fray and eventually pull your seams out.
Before doing any sewing, I cut out all of the pieces starting with the Dacron. I chose to start with the Dacron because I hadn't received the ripstop nylon yet, looking back it was a good thing that I did - not only are the Dacron pieces smaller (therefore easier to trace correctly), the Dacron doesn't slide around as much as the nylon and is more transparent so it is easier to trace, all of those reasons make it a good "warm up." If you ordered as much as I did, you will have a decent amount of excess to work with, but you should still make sure you put at least a little bit of thought into cutting the parts so as to waste as little fabric as possible. Who knows you might have enough left over to make a small kite.
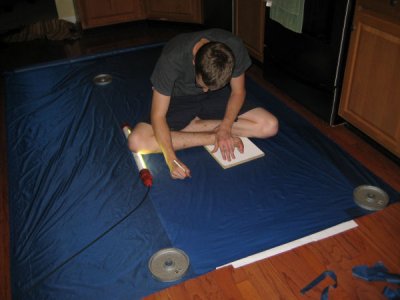
In order to trace the large panels from the ripstop I had to ensure that the fabric wasn't shifting around. This is very difficult as the fabric is very slippery and the panels so large you can't help but lean on the fabric to reach. I found the best way was to keep the fabric taught with some weights, then put a board in the center of the panel to sit on and trace the panel "around me." The board put a nice distributed force on the fabric keeping it in place, and it gave me a convenient place to sit. After the panels are traced, cut them out with the soldering iron cutter making sure to leave a seam allowance.
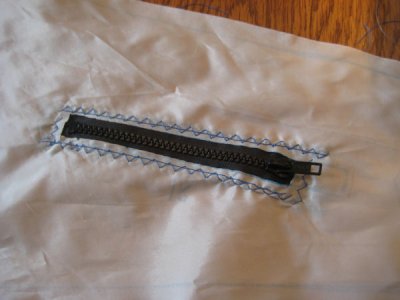
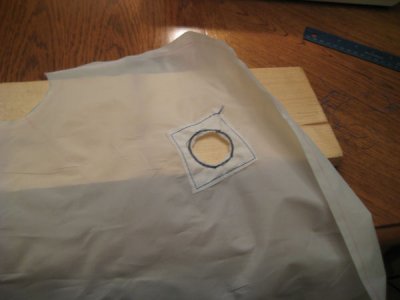
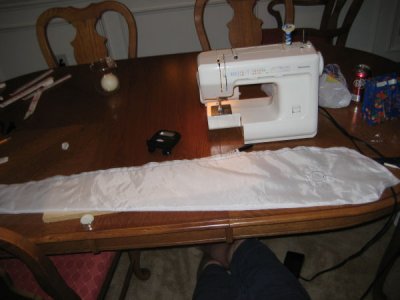
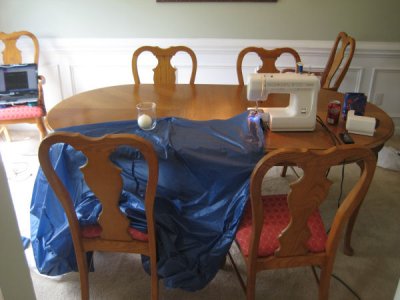
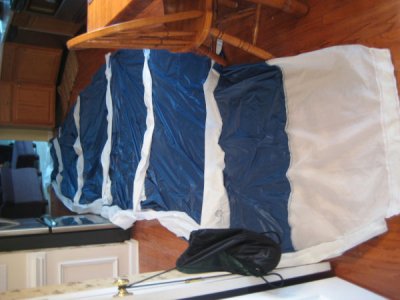
Now that the panels are cut out the next step is to sew everything together. I found this page to be very helpful with explaining the types of stitches used and how to set up the sewing machine properly. In making the kite I used the Plain Seam for joining the canopy panels, and the stitch described in the instructions included with the plans for the leading edge batten. Make sure that you leave enough thread at the beginning and end of your seam so you can tie them off. I tied off every seam then put a tiny drop of super glue on the knot to make sure it never came undone. I didn't follow the order of assembly used in the instructions to make the kite. I began by sewing the leading edge tube, then the battens together to get warmed up before I went on the slightly trickier canopy. I started by sewing in the zippers to the tube and all of the battens in the marked locations. I used a straight stitch to get the zippers in position, then a zigzag for strength. The zippers I used I got at Hobby Lobby and Wal-Mart. They are "sport zippers" and have nylon teeth and a coated zipper which should hold up well to saltwater. The link seems to only have zippers larger than 12 inches, but it should be a good reference for the type of zipper you need. The next thing I did was cut out the holes for the inflatable batten valves. I cut out a 1.25" diameter circle in the marked location on each batten with my cutting tool then cut a matching hole out a small piece of scrap and sewed it over the hole with a zigzag stitch for reinforcement.
Next sew the the leading edge inflatable tube pieces together (though don't sew the tube shut yet! the battens must be attached to it before sewing it shut).It is a good habit to always sew in the same direction for each piece when you have several panels joining together making a large piece. Unless you pin the pieces together there will tend to be extra fabric at the end of your stitch (this is due to the top material being under less tension than the bottom piece in the sewing machine, because of this the bottom piece is ever so slightly "stretched" in relation to the top piece. For a couple stitches it is negligible, but when you have hundreds of stitches on a 5' long seam it adds up to an inch or so mismatch at the end, and it is desirable to have it all on one side so that you can trim it off easily without significantly impacting the geometric accuracy of the kite.) This raises the question of why not just pin the seams? The answer is that it really is more trouble than its worth because the seams aren't straight, in fact most of the seams on the kite are the joining of two very different curves so that when it is inflated it assumes a tapered bent tube. This makes it very hard (e.g. time consuming) to pin.
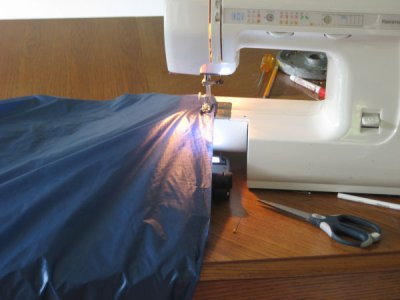
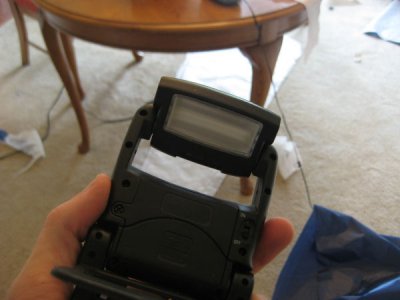
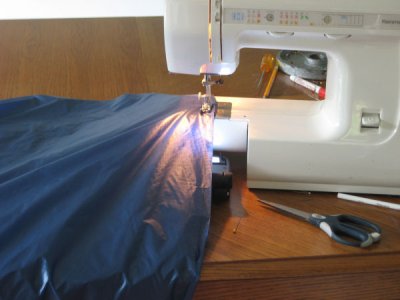
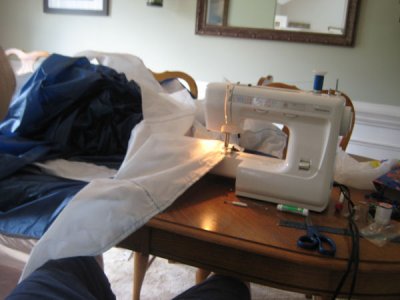
Instead of pinning the seams I came up with a neat little innovation (I'm certain its been done before but I've never seen it, so I call it innovation). Since pinning was out, I was sewing the pieces by eye, having to constantly stop sewing and lift the top piece to check that it was aligned with the one below. That also was no good. I realized that if I had a light source underneath the fabric it could shine through and I could see how well the two lines we're lining up without having to stop. Any small light source will do - a book light, small flashlight, a particularly bright backlight on a phone in a dimly lit room. I happened to have a small fluorescent light that was used with the game boy color before they put backlights into them. It provided nice even illumination and wasn't so bright as to "wash out" the lines in the fabric. If you use a flashlight or something with an incandescent bulb that tends to make a bright spot you can diffuse the light by putting wax paper or even normal copier paper over the bulb. Once I had the light in place sewing went much, much faster.
After sewing the leading edge tube sew the battens shut with a straight stitch around the perimeter. The battens need to be sewn to the leading edge tube. This is simple since there are arrows marking the stitch location on both the tube and the battens. Use a straight stitch then a zigzag for strength. These stitches aren't particularly load bearing but I like to make sure that everything is bulletproof. Make sure that all of the battens are sewn in the correct locations. It is pretty easy to fix now if you messed up but once the leading edge tube is sewn shut it would be royal pain to correct. To sew the tube shut use two straight stitches both beginning in the center and going out to the wing tip on either side (to leave excess material on the wing tips).
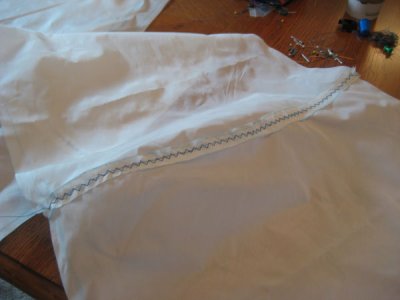
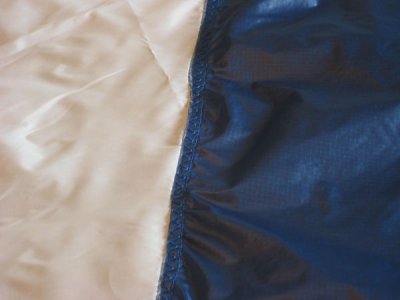
Sewing the main canopy is very much like sewing the battens and is more of a trial of patience than skill. The light comes in extremely handy here, as stopping to check if your lined up every few inches would be agony for the amount of stitching you will be doing. I joined the panels by using a plain seam which is explained on this page, then I ran a zigzag down the middle of the seam for maximum strength. Once again make sure that you sew from the front to the back so that extra material collects at the rear of the kite.
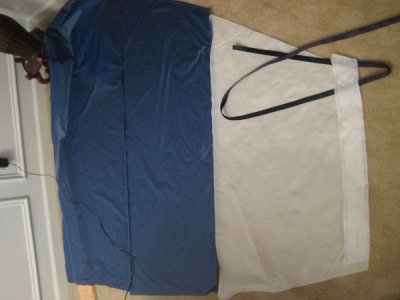
The seams on the canopy where battens would be attached I only did the first straight stitch (not doing the second stitch or reinforcement zigzag) in order to make attaching the battens easier. Once all of the main body panels are joined sew the canopy to the leading edge inflatable tube. Sew it to the fabric sticking out from where you closed the tube. I used a straight stitch then a zigzag.
Sew the battens to the canopy. Once use the arrows in the plans for start and stop locations. I sewed the battens to the unfinished plain seam on the canopy with a straight stitch then ran a zigzag down the middle for strength.
The final steps to completing the kite is to sew the wing tip batten pockets on (with a batten inside) and to attach the webbing/strap for the flying lines to connect. The batten pockets are a breeze after all the sewing of the kite. Just cut them out of Dacron and sew them on. The batten i used was a 3/8" fiberglass rod I happened to have. Anything light strong and flexible works - you could use a fishing rod, or even way overkill a fiberglass golf club shaft. The flying line attachment points are pretty straightforward. Make the length of each one about the length of the batten pocket then sew them as per the instructions to the top of the kite. (this distributes the force better). Sew them with a straight stitch on either side and a zigzag down the middle.
The instructions also mention a few other steps such as sewing reinforcement rhombuses, and a line around the perimeter of the kite. I didn't have time to put these on before I flew the kite and it has worked well so far, though I suspect a particularly strong gust of wind could do some damage to the kite without them so I recommend adding them - I just don't have any images.

