note I wrote this article as a teenager. Please excuse any spelling or other errors :]
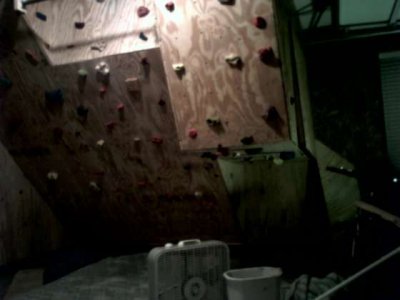
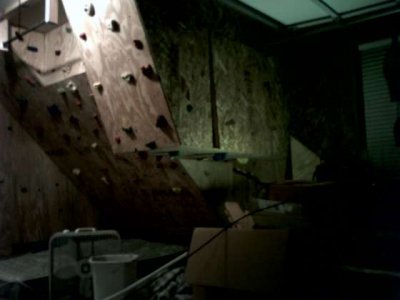
I love rock climbing. I love it so much that I decided to build a climbing wall in my garage. I show how I designed and built a climbing wall in my garage for relatively cheap. Of course every garage varies so my design probably couldn't be copied exactly but hopefully showing how I did will show all the basic concepts behind building a wall and give you a good idea on how to go about this large undertaking should you choose to do so. The total cost of the project was under $400 (that includes holds so if you made your own holds it would be ~220$) and is well worth the investment. An added bonus is the wall has a door that can be opened so it doubles as extra storage space. (or if you don't need storage space but have kids (or you're a kid yourself) you could use the inside as a pretty awesome fort). It really is up to your imagination. But without further adieu we will delve into the finer details of climbing wall design & construction. If you would like to build your own wall the information below should give you a nice start.
BRAINSTORM
This is the part that you sit down and decide what you want from your climbing wall and combine that with what you're capable of doing based on space limitations, cost, ability, etc.
After brainstorming I compiled a list of the things I NEEDED my wall to have:
-Large 45 degree overhang for the main climbing area, to be used for strength and endurance training.
-Smaller 90 degree overhang for super intense workouts.
-25 degree lead out from the 90 degree that i could mount a Jacobs ladder to for finger strength training
-A pull up bar
-Access to the inside
And a list of things i WANTED to have:
-A vertical wall just for fun
-A variable angle part
-Some sort of bulge
-Anchors at the top to belay small children
I also instituted a budget of $500 that I didn't want to exceed.
You take all your requirements then go on the the next step DESIGN where you put all this together to make the best wall possible that meets as many of your constraints as possible
DESIGN
This step is where it starts to get exciting. Let your imagination run wild.
I went through a lot of different ideas. Although not necessary at all if you have access to 3d design software it can really help visualize your designs. It also comes in handy later when calculating lumber lengths ( it does the trigonometry for you). Make sketches and think about many different designs. Then choose the best things about each design and try to combine them to make the best design possible.
I took measurements of my garage and noted that i had a back corner 12' x 8' x 8' to work with. Make sure you keep the size of your space in mind when designing. It would be horrible to design a great wall only to realize it doesn't fit your space.
I went through many revisions of my design. Also be aware of the materials you will be using to construct your wall. If like me you're using 3/4" plywood you want to avoid curves as much as possible and complicated angles make construction extremely difficult. After considering this I decided to forgo having a bulge and the variable angle part of the wall. Just remember keep it as simple as possible while still meeting your requirements. Every outside feature of the wall has be supported somehow by an inner frame. So trying to keep it to large square faces while still meeting all your design requirements is the easiest way to go.
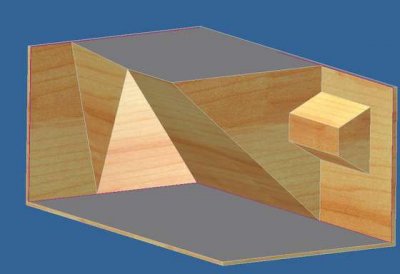
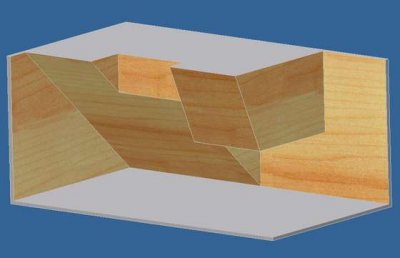
Eventually I settled on the basic design below. The next step was to figure out the structure of the frame and how the wall was going to be attached to the wall. When designing the frame and developing final dimensions be aware of your building materials. I was using 4 x 8 foot pieces of plywood so i designed my wall to be 12 feet wide (3 sheets of plywood) and also spaced the studs accordingly (4 studs per sheet of plywood, touching pieces of plywood share a common stud) Doing this helps prevent having to waste wood. Can you imagine having to buy an extra sheet of plywood (almost $30 a sheet!) only to cut a small piece out of it because you made the wall a foot too wide.
Thinking ahead can save a lot of time and headaches.
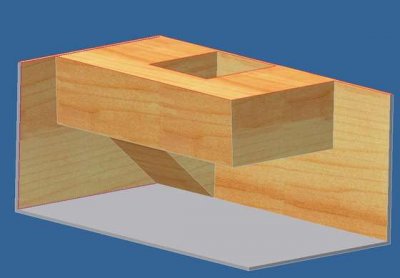
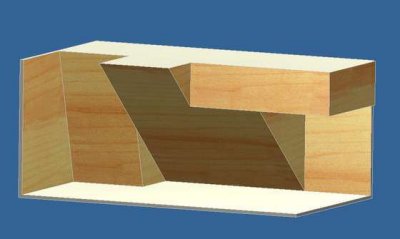
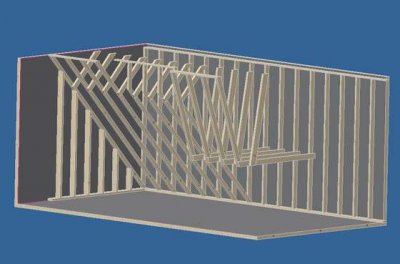
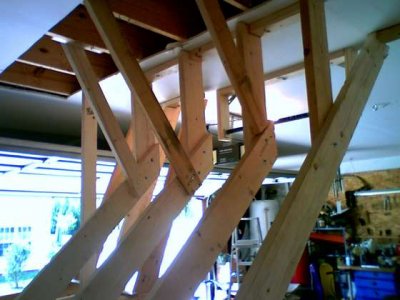
After a while I got to the framework design shown in the last photo. At this point I hadn't designed the door to get inside the wall but I knew that it would be on the vertical wall just above the 90 degree overhang. Having this model of the joists allowed me to get a good estimate of how much wood i would need. This can all be done on paper, I just didn't feel like doing the math.
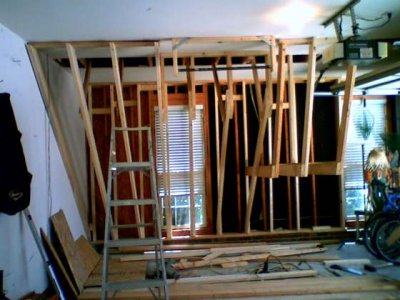
As you can see in my design basically all the terminating ends of the boards are screwed to a 2 x4 at the very top. This is then bolted through the ceiling to the joists. I wasn't satisfied with this and I'm a big fan of over engineering so I cut the drywall off the ceiling and added braces directly from the studs to the ceiling joists.
The way the climbing holds are attached to the outer plywood "skin" is there are fasteners called 't-nuts' attached to the opposite side of the plywood. Essentially bolt attached to the opposite side of the plywood as the hold. They bite into the wood so that you can bolt the holds to the wall without having someone on the other side holding the bolt with a pair of pliers. They have a 7/16" outside diameter and I arranged them on my plywood in a 8" x 8" grid which gave me a total of 72 t-nuts per sheet of plywood. They are prodigiously expensive if you buy them at a brick and mortar store (think 35 cents a piece) but if gotten off-line they are relatively inexpensive. Mine were 9 cents a piece. I ended up getting somewhere around 500 or so and i had quite a few extra. Mine took over a week to get delivered so if your committed to making a wall now is a good time to order them.
Gather Supplies
At this point you will have pretty good plans for what your going to do. So now you need to go get your supplies and start building.
I used
Tools
-Circular Saw
-Protractor
-Tape Measure
-Jigsaw
-Drill with Phillips head driver, 7/16" drill bit for the t-nuts, drill bits to match my lug nuts and lag bolts
-Hammer
-Chalk line
-Socket wrench
-Pliers
-Work light
-square
-level
Wood
10 - 2" x 6" x 12' pine boards
~33 - 2" x 4" x 8' pine boards
5 sheets - 4' x 8' x 3/4" pine plywood
Building Supplies
-5lb 2" deck screws to attach plywood to wall
-535 t-nuts
-2lb 3 1/2" galvanized nails
-2lb 4 1/2" galvanized nails
-1lb 4" deck screws
-Assorted washers
-2 heavy duty hinges
- about 25 -1/2 x 5" lag bolts
-about 25 - 1/2 x 4" hex bolts
-bolt hangers (used in sport climbing)
-Aluminum strips (to reinforce pull up bar)
Build!
I'm not going to go into an exhaustive explanation of my entire build process - it will vary a great deal depending on the design of your wall and the location you decide to put it. And a project like this shouldn't be attempted without basic construction knowledge. However there are a few important things.
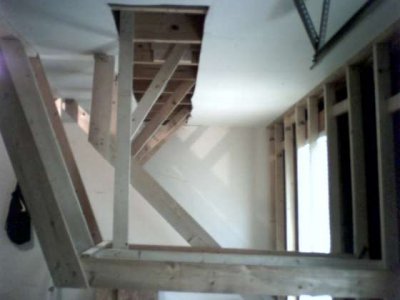
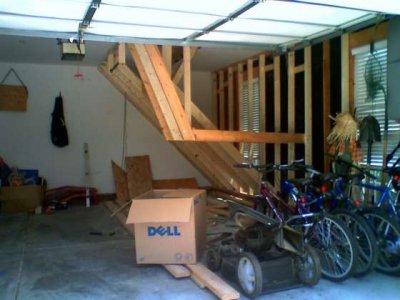
First anything load bearing should be bolted - not screwed or nailed. In the pictures you can see that the 2 x 6 joists are attached to a 2 x 4, there is a bolt doing down through the top of the 2 x 4 into the 2 x6 then the 2 x 4 is bolted to the ceiling. Nails come loose with vibration, screws tend to snap. Anything load bearing gets bolts. No exceptions. (well of course the plywood is screwed onto the frame but I'm talking about when constructing the frame)
After constructing the frame it was time to prepare the plywood for attaching to the wall. The general rule for t-nuts is 72 per sheet of plywood. This means that there is a rectangular pattern of one t-nut every 8 inches in both directions. I marked the plywood using a chalk line then drilled the hole where the two lines intersect. Here is some more information about this process. (Morganic has very good hold prices, I bought a number of my holds from them)
http://www.morganicclimbing.com/Help/TNuts.htm
When you drill the holes for the t-nuts drill from the side that is going to be facing outward that way any splinters wont be seen. I find it easiest to do one sheet at a time
1. Drill holes
2. Flip over
3. Set aside and do next sheet.
You don't want to hammer the t-nuts in just yet because you'll probably be cutting the plywood and not only will a t-nut ruin a saw blade but there's no need to waste t-nuts on waste parts of the plywood that won't be used.
You could probably use a piece that was already drilled as drilling template.
The next step is to mount the plywood
Mount Plywood & Make Door
When mounting your plywood at least 2 people are required. The sheets weigh at least 20 ponds a piece and they are very awkward to hold. If the plywood has to be cut make sure that you measure 5 times and cut once. There's nothing worse than loosing $30 (and a lot of work drilling and hammering t-nuts) because you rushed and cut a piece too short. I had someone help me hold the plywood in position and put 2" deck screws in all four corners then a couple near the middle then my assistant could let go. The rule of thumb I utilized was 1 screw every 8 inches. Which is more than enough.
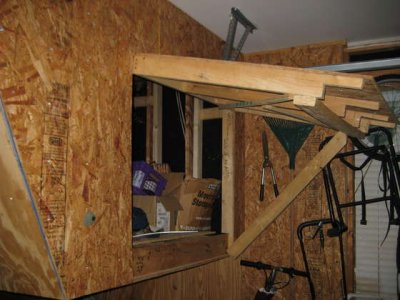
For the pieces that need to be cut to special shapes I made very careful measurements of lengths and angles checking many times before making a cut. After cutting the piece i would hammer in the t-nuts then screw it to the frame. I left the side where the door would be "un-skinned" because I didn't have a design for the door yet. I need a door that was strong enough to be climbed on.
In the end I made the door hinged from above with a small latch at the bottom that keeps it closed.
The next step is to mount the holds!
Mount Holds and Finishing Touches
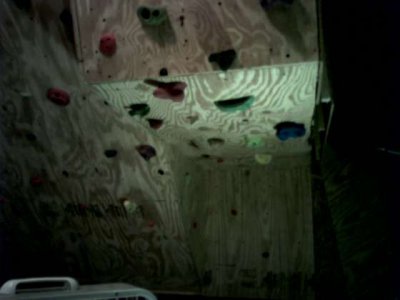
Hopefully you've got your hands on some holds or at least ordered some by this point. Setting routes is an art form and I wont go into it in this instructable (another day). There is no set way to do it, and it varies from wall to wall but the best way to break in a new wall (in my opinion) is to evenly distribute the holds all over the wall then start climbing, moving the holds around one at a time to work certain moves into the wall etc. Mess around with it for a while until you get tired of it then change them around. The hold configurations are essentially endless. If you somehow managed to run out of hold configurations you can always buy more holds or make your own! Which would make another great instructable.
At this point I also mounted the belay points. I bolted 3 bolt hangers to my ceiling joists about the wall just to belay my small brother and to help aid in teaching people to belay.
As for the pull up bar. I had already mounted it at this point but basically it is just a square frame made from 2 x 4's that is bolted to the ceiling joists.
Climb!
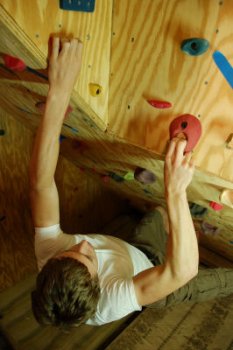
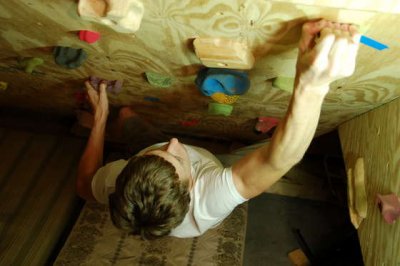
At this point you enjoy your wall! Take some artistic climbing pictures, whatever your into just do it!
(you can see some home-made wooden holds, that's another whole instructable in its self.
Closing Remarks
If you're really into climbing and would utilize a home climbing wall, this is a very fulfilling project to undertake. It is somewhat difficult but anyone with basic carpentry skills and a little bit of math can make their own design and build it.
Something I learned is that although they are fun for a while vertical portions of the wall really are rather useless when it comes to training (for me at least) in fact most of my holds are on the overhang parts of the wall and I'm using the vertical bits as convenient tool holders. The point is make sure that you think about all the components of the wall before you build it and make sure that it meets all your requirements. You want it to be a wall you have fun on and enjoy not a wall that you say "if i would have only built (blank) it would be perfect"
I forgot to mention that you will also need to acquire some sort of something to cushion your falls, i have carpet padding, 2 mattresses and actually some rolled up carpet. The carpet rolls are dense but are better than falling onto concrete.
If your pulling some tricky moves (feet above head) make sure you always use a spotter because your neck is like a toothpick just waiting to be broken and if you break your neck what is the point of having a climbing wall? So make sure you use a spot!
My instructable is meant only to inspire and give an example as to what can be done relatively easy. I'm not posting it to be copied exactly (you can if you want) but let your imaginations run wild, get out there and design. If you're going to do this make it your own and learn something (or some things) while doing it. Have fun and be safe! (and don't break your neck!)

